
©Pat Ashforth & Steve Plummer 2021
©Pat Ashforth & Steve Plummer 2021


THREE COLOUR STRIPES
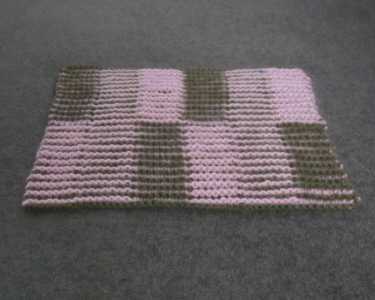
A simple striped design, where you see two-


To knit this design
Section 1
Using Dark cast on 48 stitches. This counts as the first row of the first ridge.
Ridge 1 -
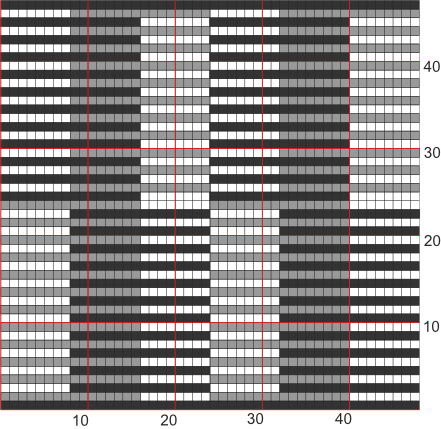
The chart shows all knit.
Ridge 2 (Light) : Knit the first row. On the second row knit the coloured stitches and purl the white stitches.
The chart shows k16, p8, k16, p8
Ridge 3 (Dark) : Knit the first row. On the second row knit the coloured stitches and purl the white stitches.
The chart shows p8, k16, p8, k16
Ridge 4 (Light) : Knit the first row. On the second row knit the coloured stitches and purl the white stitches.
The chart shows k16, p8, k16, p8
Ridges 5 -
Section 2
Ridge 25 (Dark) : Knit the first row. On the second row knit the coloured stitches and purl the white stitches.
The chart shows k16, p8, k16, p8
Ridge 26 (Light) : Knit the first row. On the second row knit the coloured stitches and purl the white stitches.
The chart shows p8, k16, p8, k16
Ridges 27 -
Ridge 47 (Dark) : Knit the first row. Cast off on the second row.
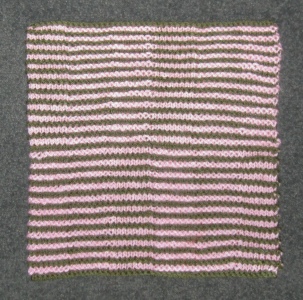
The square is shown with no border.
To neaten the edges
Turn the work sideways and pick up one stitch from the end of each ridge. Cast off loosely on the next row.
If you would like wider borders, work a few ridges of garter stitch before you begin the chart and end with garter stitch to match. Add the same number of ridges of garter stitch on the sides before casting off.
| The Gift of Life |
| Merry Christmas |
| Drawing Programs |
| Using Inkscape |
| Modelling Programs |
| George Maffett's Introduction |
| Art tutorials |
| Geometric tutorials |
| Video tutorials |
| Maple Leaf |
| Tiger |
| Maple Leaf : Part 1 |
| Maple Leaf : Part 2 |
| Maple Leaf : Part 3 |
| Tiger : Part 1 |
| Tiger : Part 2 |
| Tiger : Part 3 |
| Tiger : Part 4 |
| Tiger : Part 5 |
| Tiger : Part 6 |
| Tiger : Part 7 |